Crafting Engaging Math Worksheets: A Step-by-Step Guide
Creating effective math worksheets doesn’t have to be a daunting task. Here’s a practical guide to developing ten engaging and educational worksheets, focusing on different skill levels and mathematical concepts.
1. Define Your Learning Objectives
Before you start, determine the specific mathematical skills you want to reinforce. This might include addition, subtraction, multiplication, division, fractions, decimals, geometry, algebra, or problem-solving. Clearly defined objectives will ensure each worksheet is focused and targeted.
2. Choose Appropriate Difficulty Levels
Consider the target audience. Create worksheets with varying difficulty levels to cater to different learning needs. You might design three worksheets for beginner level, four for intermediate, and three for advanced. This allows for differentiated instruction and helps students progress at their own pace.
3. Select Engaging Themes and Contexts
Math can be more appealing when presented within a relevant context. Use themes that resonate with your students. For younger learners, consider using animals, sports, or popular characters. For older students, real-world applications like budgeting, cooking, or travel planning can make the problems more relatable.
4. Design Varied Problem Types
Avoid monotony by incorporating a mix of problem types. Include multiple-choice questions, fill-in-the-blanks, word problems, and visual representations. For example, for a worksheet on fractions, you could have students shade in parts of a shape, solve fraction equations, and apply fractions to real-world scenarios.
5. Incorporate Visual Aids
Visual aids can significantly enhance understanding, especially for younger learners or visual learners. Use diagrams, charts, graphs, and pictures to illustrate concepts and make the worksheets more visually appealing. For instance, when teaching geometry, include diagrams of shapes and angles.
6. Provide Clear Instructions and Examples
Ensure that instructions are clear, concise, and easy to understand. Include examples to guide students through the process. This is particularly important for new concepts or complex problems. A well-explained example can reduce confusion and build confidence.
7. Prioritize Neatness and Organization
A cluttered worksheet can be overwhelming. Use clear fonts, ample spacing, and a logical layout to make the worksheet visually appealing and easy to navigate. Group similar problems together and use headings to organize different sections.
8. Create Answer Keys
Prepare an accurate answer key for each worksheet. This will allow you to quickly assess student understanding and provide targeted feedback. It also allows students to check their own work and learn from their mistakes.
9. Review and Revise
Before finalizing your worksheets, carefully review them for accuracy and clarity. Ask a colleague or another student to review them as well. Identify and correct any errors or ambiguities. Even minor adjustments can significantly improve the effectiveness of the worksheet.
10. Test and Refine
After your students complete the worksheets, gather feedback on their experience. Observe which problems were challenging and which were easily mastered. Use this information to refine your worksheets and make them even more effective in the future. Are the worksheets too difficult? Too easy? Are the instructions understandable? Continuous improvement is key to creating high-quality learning resources.
 736×952 making ten math worksheets planner hexagon from cmd.hexagon.com
  816×1056 worksheet making ten worksheets grass fedjp worksheet study site from www.grassfedjp.com
  600×314 addition strategies ten worksheet teach starter worksheets library from worksheets.clipart-library.com
  724×1024 ways ten freebie packed minds work worksheets library from worksheets.clipart-library.com
  1200×800 grade level worksheets wellspring worksheets worksheets library from worksheets.clipart-library.com
  1275×1650 ten worksheets from studysimpogo.z21.web.core.windows.net
  888×1154 printable making worksheets from printablefissure71.z4.web.core.windows.net
 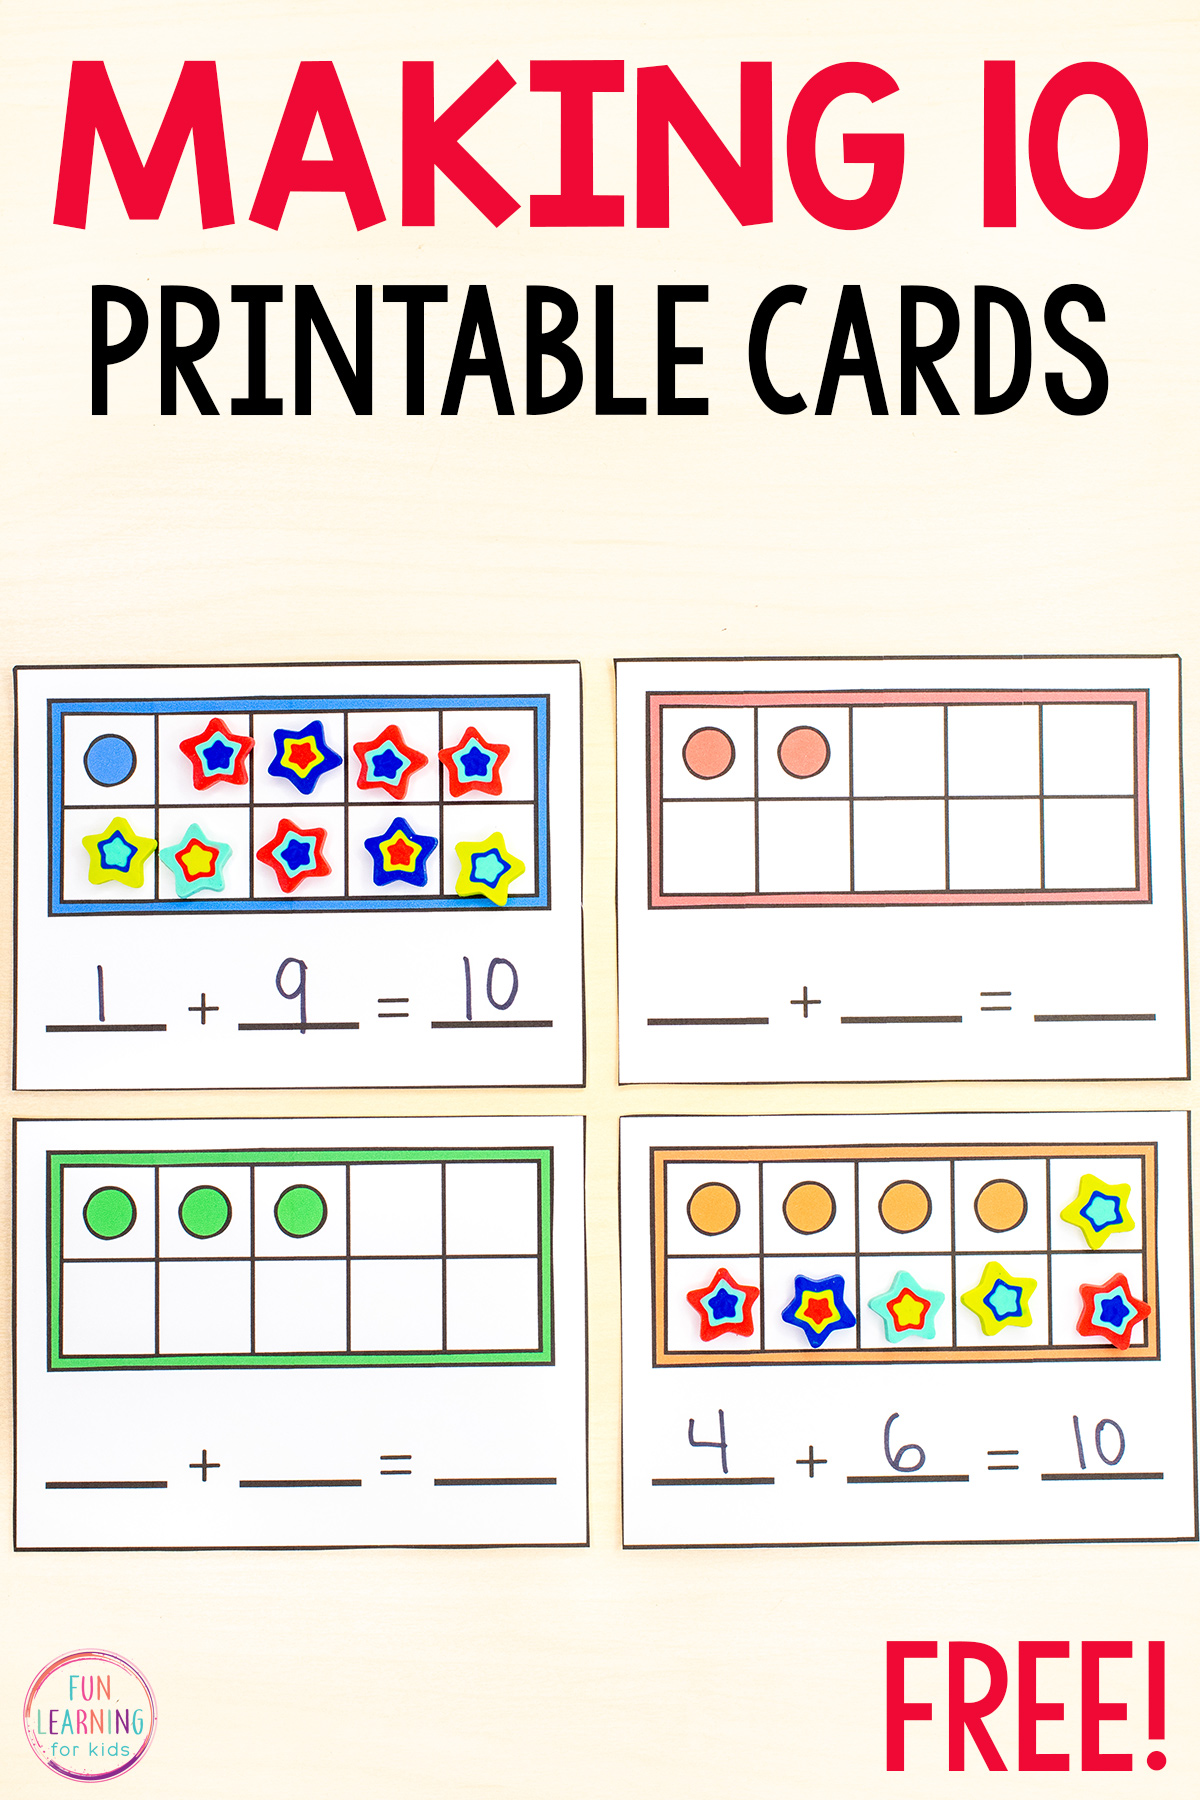 1200×1800 ten math activity printable from funlearningforkids.com
  618×800 making ten math worksheets printable word searches from davida.davivienda.com
  736×1104 making ten math worksheets differentiated worksheets math assessment kindergarten from www.pinterest.com
  1200×1200 ten math activity teachers from www.madebyteachers.com
  1275×1650 making ten worksheet kindergarten math worksheets math addition worksheets st grade from www.pinterest.nz
  450×600 grade math centers unit addition fact fluency adding making add grade from www.pinterest.com
  2201×2683 making ten math worksheets printable enjoyable learning from newark2.remotepc.com
  270×350 making ten math worksheets diane aleksa tpt from www.teacherspayteachers.com
  1275×1650 making ten add worksheets from classzoneamputates.z14.web.core.windows.net
  960×960 lucky learn math add ten lesson worksheets library from worksheets.clipart-library.com
  1024×1325 lets ten tons fun hands learning school kindergarten math from www.pinterest.com.au
  736×1104 making ten math worksheets differentiated worksheets kindergarten math assessment from id.pinterest.com
  736×1104 making ten math worksheets differentiated worksheets from www.pinterest.com
 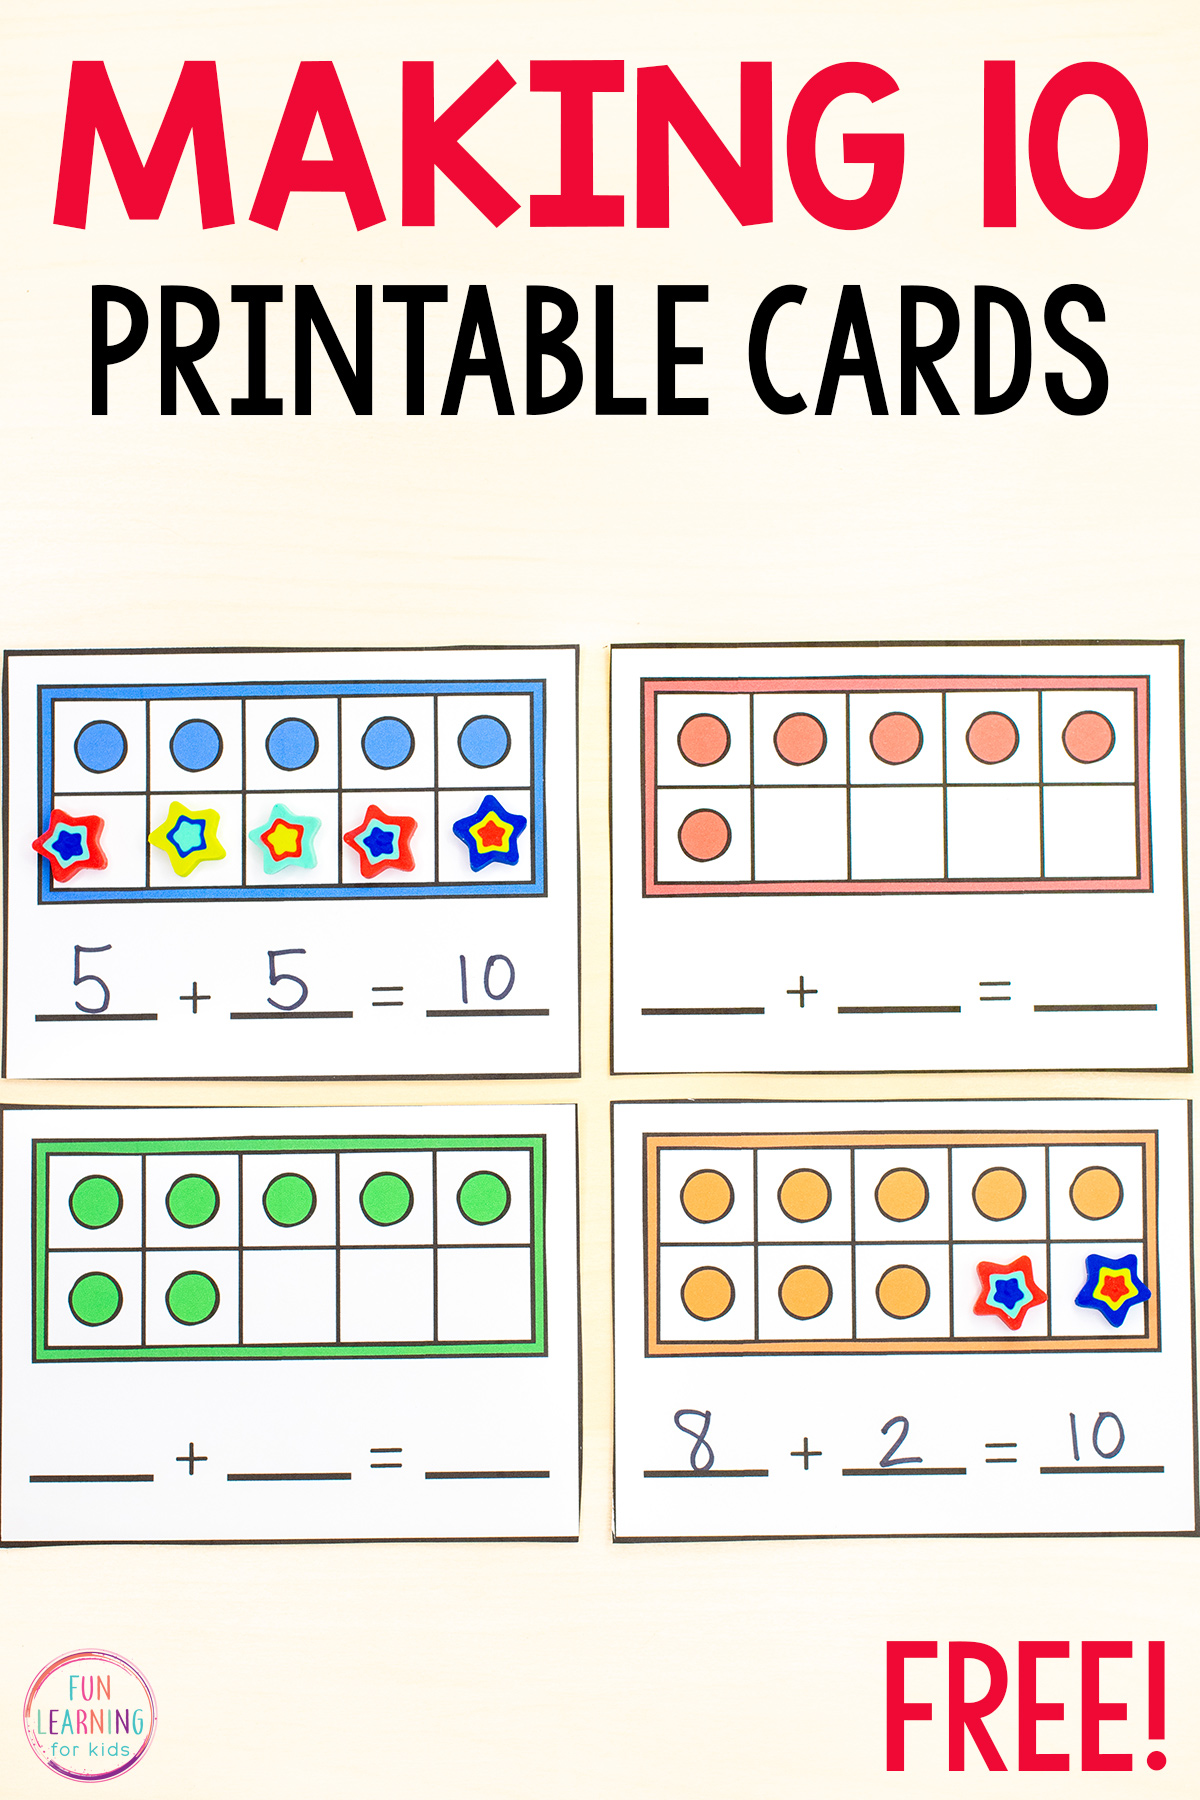 474×711 ten math activity printable audit student from auditstudent.com
  1200×1800 ten add worksheets add ten worksheets math gr from zjtspkudflessonmedia.z14.web.core.windows.net
  736×952 making ten worksheet kindergarten math worksheets kindergarten worksheets grade from www.pinterest.com
  800×1035 ways worksheet kindergarten math worksheet kids from www.kindergartenworksheets.net
  680×880 ten frame math activity duplo printable sheets from littlebinsforlittlehands.com
  270×350 ten math freebie educatoratcore tpt from www.teacherspayteachers.com